Showing posts with label crafts. Show all posts

Sunday, June 17, 2012

Mike's Father's Day

For Father's Day this year we made Dad this nifty sign to hang in his office at work. It says "Doodles for Daddy" on the top then the quote from Picasso "Every Child is an Artist" on the bottom. I then fitted it with some clips to hang the pictures the kids draw for him. That way he can continually switch them out for new updated special pics from the kids as they draw him more.
He also picked himself out a new Superman ballcap a couple of weeks ago.

We made him our traditional homemade donuts for breakfast. It was a pretty good morning for him.

Mushroom Family


Here's the cute little crafty project we did last night. I had the Cricut out to finish Mike's Father's Day project and we decided to play with some software and try it out. Mike did most of the work and made this cute Mario Bros 1 up mushroom family for his car window. We love the way it turned out. Great Job Honey!

Sunday, March 11, 2012

New Nephew Shower

My sister Tracey is having a baby! In about a month I will have a new nephew to love and spoil. We spent this weekend giving her a shower in Price. But first of course, we planned and created. She loves frogs so we went with a frog theme and Mike helped me make these cute invites.

And water-bottle wraps


And I made a couple of these topiaries


We had a cousin of ours make cupcakes and I made cupcake pics to put in them.


At the shower we munch on a yummy lunch of soup and salad. Then played one game. It was a stumper.


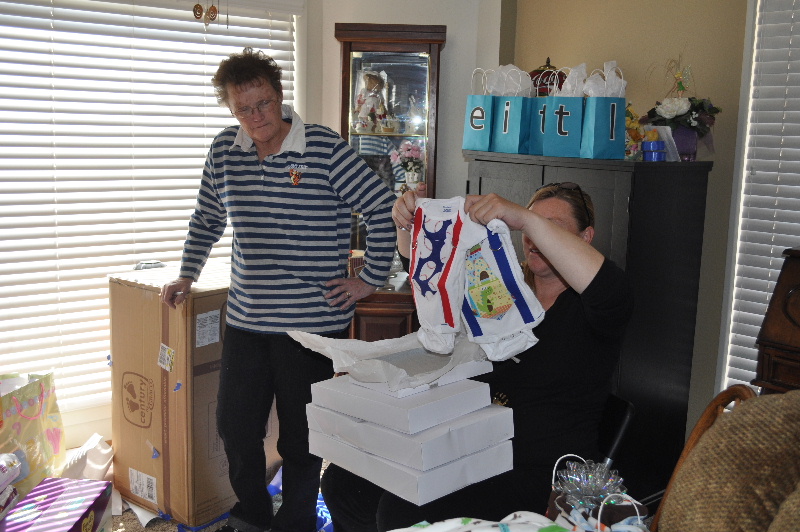
Then it was time to see all the tiny goodies for this baby boy.


I think she made quite the haul and this is going to be one stylish little dude.


Thursday, March 01, 2012

Bucket O' Seasons


This year we want to make sure to get in lots of family activities so on one of my crafting weekends, we did a variation of the "bucket list" ideas ala Pinterest and made us a seasonal bucket list of all of the stuff we want to get done in each season. Some of the stuff are things we do every year so they'll be able to be reused over and over and some are some new additions. Since it's March now, we are starting with the Spring list. I think this is a fun way for the kids to keep track of what we have done by taking the clothespin off when we complete something and dropping it in the bucket. It's also a good way for them to stay excited about the things we still want to get done. And since these activities are pre-thought out we won't be sitting around wondering what to do. Ideas will be right there in front of us. So here's what we have on our Spring bucket list.


  • Go to the Zoo


  • Go to the Tulip Festival


  • Plant flowers


  • Family game night


  • Ice cream date


  • Play at the park


  • Fly a kite


  • Make a craft


  • Go to a movie


Can't wait to get started. maybe we'll even try to knock one of them off of there this weekend.

Sunday, February 26, 2012

Crafty Weekend

It's been a busy but productive weekend here. On Friday Mike was in Vegas for work so I got to take my boyz out to dinner at McD's and let them run off energy in the play place then settle in at home for some movie watching time where we watched Mr. Poppers Penguins until Dad got home in time to tuck us in. Then Saturday started the real fun. I had an appointment to get my hair dyed and cut in Lehi so decided to stop at a place called The Wood Connection in Murray that I had been hearing lots about on the way. The place was packed with people so we didn't stay as long as I would have liked too but I did come out with a few projects and after getting my hair done and going out to dinner with some friends I started the first one. This fun St. Patty's sign.

This morning after the craft store opened I went and picked up what I needed to finish the St. Patty's one and start 1 of the 2 Easter projects I picked up. Mike helped with this one while I went to my monthly craft-date with my friend Becca Y. He had it all painted and ready for me to add the sparkle when I got home.


At Becca's house we made a couple tutu's. Here's the one I made for Miss Faith. I still need to do some finishing work on it but I've been wanting one in these colors for her so I am super excited about it.


And we made a few bows. Here's the 4 I got done today.


Amongst all of that we dealt with sick kids (off and on) and laundry and the normal household stuff that drags us down. It's always so much fun to put some of that off once in a while though and just have some creative goodness.


Sunday, October 09, 2011

Boo-tiful Prints

Today was a busy but good Sunday here at our house. I even managed to sneak in one of the many Halloween projects I've been wanting to do. I found this on Pinterest and loved it. Had to make one of my own. And the kids were all cooperative when it came to me painting the bottom of their feet for a print. It couldn't have been a more easy project. I even cheated when I went to Michael's for a canvas and bought a black one (who knew they even had those?) so all it was was white craft paint a little black paint for the eyes and some funky ribbon. Easy-Peasy.


It's fun, funky and something I'll be able to still cherish and display years from now.


Sunday, September 04, 2011

Shark Board

Yesterday I had very good intentions of getting the house back in order. I mentioned to my sister in the morning that I was feeling crafty and was trying to decide which one of my millions of projects in my head to work on. I noticed Mike had been outside for a bit. When I went out to see what he was up to, I found him drawing on a board to do the project we've been talking about to finish of the kids new shark bathroom. Apparently he was feeling a little crafty too. So he cut it out for me, sanded it and painted it. Then I broke out the Cricut for the decorations and words. I'm pretty pleased with the way it turned out. Now we just need to get it hung.


Needless to say, the house chores went neglected one more day and we created more of a mess to clean up. I also tried out another project I had seen on another blog while I had the Cricut out. It didn't turn out perfect but it turned out pretty darn good for a first try. I might be making some more for Christmas gifts this year so sorry no pictures yet. Good thing it's a 3 day weekend. Time to get to those chores, unless another project pops up ;).


Friday, May 13, 2011

Bow Holder

I was perusing the net this morning trying to get some ideas of storage for the hair bows and flower clips I have already started collecting for little miss Faith when I came across something like this and thought, "I could do that." So then I was on a mission to get to the craft store and get my supplies. I picked up some various ribbons in the color scheme that we are dreaming about for her room. Ladybugs, pink, green and browns. A blank canvas and some liquid fusion glue as well and I was on my way to projectville.


First I measured and cut some ribbons the length (plus a little extra to wrap around the back) of the canvas. Then I also cut up an old index card to use as a spacer between the ribbons to keep the spacing as even as possible and started gluing, gluing, gluing.

This is what the back looks like when I was done gluing and waiting for it to dry. I love projects that the back doesn't matter. Only add glue to the ends since you want the ribbon on the front to be loose enough to clip the bows and flowers onto.


Once they were all dry enough I flipped it over and attached another ribbon for hanging and some loose ribbons for decoration on the top.


Now that it's all finally dry, I hung it in that room for a little test run to make sure the glue is going to hold up and added a few of the bows to it.


I love it. Of course you could always paint the canvas first, or cover it with a patterned material. That's the thing I loved about this project, the possibilities were endless with material, paint, and ribbon possibilities. But plain white seemed to work in my case for the look I was going for. And it was super simple. I am thinking these would be great little baby shower gifts and/or birthday gifts for the little girls in your life. Other than drying time it only took me about 30 minutes. Happy Crafting Day to me.

Thursday, May 05, 2011

Mother's Day Project

Caleb is really getting into a phase of wanting to make gifts for people instead of picking them out something in the store. He is always making cards for people and drawings and so when Mother's Day was coming up this year of course we decided to go with the homemade route again for all of the Grandma's. We went to Hobby Lobby for a little inspiration and Caleb decided he would like to try out soap making. I had never done it before either so I thought it sounded kinda fun. So we bought a few essentials to start out and came home to give it a whirl.


I am happy to say that Caleb loved every minute of it. He got to help run the microwave to melt the soap, put coloring in to make fun colors and pour them into the bug mold he had picked out in the store.


It was a very fun project for him and the twins loved watching and yelling "BUG!" every time we would squeeze the completed ones out of the mold. We wrapped up a set for each Grandma and enclosed a card. Now that they have all been delivered, I get to share the pics. We made enough for 4 Grandma's and we even had some extra to send to Aunt Tracey for a little Happy Mother's Day as well. Caleb has already asked to make it again and requested that we get some more molds and more specifically, a shark mold to make some more with. Should be loads of "clean" fun coming up in this house.


Friday, November 05, 2010

Mr. Turkey

Some ladies at work handed these out to the office the other day. I wish I could say they were my idea or that I had anything to do with them, but sadly I can't. But they were so cute and so simple I had to share.

They gave them out with a cute little poem attached. You could make your own and copy the poem or come up with one of your own. These are great for co-workers, friends or even neighbors.

Supply List:
Fall colored mesh
Coordinating ribbon
Pipe Cleaners (tan and/or brown, and red)
Googly eyes
M&M's
Happy Crafting!

Saturday, July 03, 2010

4th of July Treat

Here's a quick and easy 4th of July goodie for your BBQ's and get togethers. Chocolate dipped marshmallows on skewers with sprinkles. I did some regular marshmallows and some strawberry flavored ones and decorated them with blue and red sprinkles. I also did both dark chocolate and white chocolate combinations.
They made a great, fun and edible centerpiece for my glitter toe/hair flair party I hosted last night. The table looked pretty festive.

I got this idea from a cousin of mine she had used the star shaped marshmallows which was even cuter, but after 4 stores of looking for them I gave up the hunt. I am still really pleased with the result though. Fun, easy and I didn't let the kids help this time but it would certainly be something they could do and enjoy. And they are loving eating and can't seem to get enough.

Tuesday, June 15, 2010

New and Glorious!


Isn't it beautiful? My favorite vinyl supplier Regional Supply was having a summer craft fair today and tomorrow to check out some project ideas and the latest and greatest in the vinyl world. When I walked in the door and was told to check out the patterned vinyl, my heart skipped a beat. Patterned vinyl? Could it be? Oh it was! And it was glorious. I would have liked to get one sheet of every pattern but alas I had to control my urges since I needed to stock up on some of my old favorites as well. So I ended up with three sheets to play with. Now here's the problem, what do I make with them? Any suggestions?

Friday, May 07, 2010

We Heart Moms

Wow! Mother's Day has really snuck up on us this year. I barely got myself in gear last weekend and I am happy to say that we managed to make our gifts and get them shipped in time, even a little early. :)
When I came home from work on Thursday Caleb met me at the door with this heart he had made from pearler beads. He was excited that he had done it all by himself. He told me it was for Mother's Day. Of course I professed my undying love to it and added some magnetic backing and proudly have it displayed on the fridge.


Now that these have all been mailed and delivered, it's safe to show off what we ended up making. The boys made some art work for all the grandma's with their hand prints. We weren't sure how the twins would react to us painting their hands but they surprised us and loved it. I see a lot of finger painting in our future.


We love you Grandma's. Happy Mother's Day to all the Mom's out there that read my little old blog. I hope you have a great day on Sunday and get spoiled rotten.

Saturday, May 01, 2010

Calendar It!

In an effort to try to consolidate some of the chaos that often takes over our kitchen, I have been in the market for a new dry erase type board. Something to write notes, appointments, the weekly menu, honey do lists, and the like. While out shopping last weekend we came across this at Roberts and since we had a 50% off coupon, I decided to give it a go. I bought the "unfinished" version so I could make it more my own. So here it is in it's naked version.

We still have the leftover paint from our kitchen re-paint we did in January. So I painted it the same grey as our trim.
I had Mike drill some holes for me to add a little ribbon flair and cuteness. I chose some green gingham ribbon to match the John Deere decoration motif I have going on.


And of course, added some of my own pictures and broke out the Cricut for some vinyl lettering. I was deep in thought on what to write on it and was asking and searching for suggestions, when Allison suggested "Organized Chaos" just like my blog. DUH! Why didn't I think of that? As I passed that idea around to Mike and others that I had been asking they all like it, and it so fits to what this is.

On the last bow I hung a plastic sleeve to put things such as Caleb's pictures he has hanging all over the kitchen, important papers that correspond to calendar items, grocery items, appointment cards and things I want readily available. And I like the idea of it, but not sure I am sold on the sleeve. I may look for something else to hang and serve this purpose or a verticle hanging sleeve. Or I may scrap it all together and have it just be a good idea that didn't pan out. Opinions/suggestions on this section are welcome.
So this new board will serve as:
1. Monthly calendar (still haven't given up the regular calendar but this is a step closer to one less thing hanging in that area)
2. Note space (always needed)
3. Picture displays (or they may turn into more note space, still deciding)
4. Weekly menu on the calendar days (whoo hoo !I can trash the other dry erase board that floats around from place to place.)
5. Consolidated space for numerous papers, cards, art work etc. ( I think my fridge is jealous to have all the papers off of it)
I'm still not sure it's completed. But overall I like it. Onto the next project. Pictures to come!

Wednesday, March 03, 2010

2 Buckaroo's

One month from tomorrow, we will be parents of 2 -2 year olds. Scary thought. I have been buried deep in planning mode for their party. I have been crafting and buying like crazy, it's always nice to have a good mix of both. So I thought I would share a few pics of what I have been up to for their Cowboy-themed party. First off the invites:


And yesterday I got the makings of a mighty fine banner cut out and glued together:
And of course, I've even been working on the wardrobe and made them a couple of little shirts with the iron-on vinyl.

So much fun, but I am happy to say that I am almost done on the planning side. Just have to order a cake and decide on the grub to serve. Party is on April 3rd. I'll post the rest of the decoration and party pics then. Can't wait!


Saturday, January 16, 2010

Trying Something New

My friend had started trying out some iron-on vinyl for some projects with her Cricut and I had been wanting to try it out but was a little bit afraid of it so I kept putting it off. That was until Mike decided he really wanted me to make him some "nerdy" shirts that he's been wanting so when I was out and about on Friday, I picked some of it up and tried my hand at it. It was much easier and more fun than I thought it would be, I was impressed and really liked using it.

For those of you that don't talk "nerd speak" I will explain what these mean:


Mike's is the maroon one. It reads DAD in binary (computer code). After he told me that's the one he wanted, it only made sense to make the boys each one that read SON in binary too. I will be getting them together for a pic in them sometime soon.
This is HTML programming the < > part is called a "tag" in code so this shirt says "Tag You're it"

And of course one appropriate for myself.


I have already bought the twins some shirts for Valentines Day but hadn't found one for Caleb yet so he helped me design one. If you can't read it, it says "key 2 Mom's heart" basically. I think it's cute. Mike rolled his eyes at it.
But not only did I work on shirts this weekend. I also went back to my original vinyl and put a saying on my freshly painted wall. I love the way it turned out. 2 more things to replace in this room and it really will be an all new kitchen.

I didn't think it was possible, but I think I fell in love even more with my Cricut already this weekend. Can't wait until the next time I get it out and find a project or 2 to do.